Vals and Argentine tango musicality: games and exercises

Each time I get on the dance floor to do a tango vals, I feel grateful that I was a musician for several decades before learning to dance. Timing in music is something I feel and do not have to count. When I started teaching dance, I found it hard to describe how to move to music: couldn't everyone hear what I heard?

The truth is, many people struggle with finding the beat for dancing.  I recently fielded a request about how to be more musical with tango.  I replied to that person, and then realized that this advice might be useful to more folks.

After teaching dance for 22 years, there are only a few things that I've found work for learning to hear and use the music:

1. Start listening to the music as much as possible; around the home; in the car; at the office, etc.  Even if you are not paying close attention, your brain hears the music and starts processing it better, even without moving to it.  Eventually, when you move to the music, you will REALLY move to the music because of these hours of extra "listening."  This is purely aural learning, but it helps.

2.  In classes, dances and practicas, watch the people who look like they are moving nicely with the music . . . and copy them shamelessly.  I'd suggest getting behind a leader who looks like they are musical, and try to move at the same time.  Again, this is a long process, but in patterning your body to theirs, you are learning to connect visually with the music.

3.  OK, so far, we have aural and visual elements of learning musicality.  For kinesthetic learning, my games about musicality help (see my other musicality posts).  If you are in a class that is about musicality, you experience the movement with the music, connecting #1 and #2 to this body feeling.  You can also do this in private lessons, and I'd be happy to set some up with you if you would like that.  Another way to experience this is to have a musical person lead YOU so you can follow to the music and feel it in your body; we could also do that in a private lesson.

4.  Last part of musicality that I do as another kinesthetic approach (and aural): make sounds!  That's why I make people play my "silly games" about musicality while making noise. For some folks, attaching a sound to a movement helps them to remember how to move.

Different people learn different ways.  I learn mostly visually and kinesthetically.  I have a student who learns best by saying things while moving: sounds and noises that he then associates with the movement.  I have some students who need to hear me explain things as their way to understand.  Another students needs to stand and watch others try the movement, and then can do the movement. If you know how you learn best, you can streamline the process, but this will take some time--much longer than learning steps, but EVERYONE can learn this.

I disagree with people who say that musicality can be learned with a computer program :-)

Volcada technique: make volcadas easy to follow and elegant!

In intermediate class last week, we started to learn volcadas. A volcada is a "tipping" or "dumping" motion, where the follower is tipped off-axis and then returned to axis. Usually this includes the manipulation of the follower's leg--a sweepy movement that is created by the off-axis motion.

Because a good volcada is not an easy move, many people cheat to make this happen: the leader indicates a move to the follower, lets her do the move, and then tries to get back to leading after the follower has managed to get on-axis again. Can you tell I have a pet peeve with this strategy? Leaders! Make this move work for your followers! Lead it!

What does a volcada look like?

There are as many different shapes for a volcada, as there are tango partnerships. The follower's free leg is used to draw a shape on the floor, BY THE LEADER. This can be a V-shaped wedge; a big sweeping C, ending with going to a cruzada shape; a big sweeping circle if the leader also rotates the couple; or (in what I call a reverse volcada), an unwinding into a an of a circle, ending in a plain back step for the follower.

Part of the fun of a volcada, is that the leader gets to play with the shape of the movement. Although I don't 100% agree with the technique shown here, I like how the "regular"--ending in the cross, and "reverse"--ending in walking out of the move, look here: volcada demo  Although they may be out there, I didn't see volcadas done by the three people who have taught me the most about them: Oscar Mandagaran, Luciana Valle, and Florencia Tacchetti; if you find them, please comment and attach them to the blog!

Having said that, I think that there is only ONE way to approach volcadas in terms of technique, and that is to create as much clarity as possible, good balance, and control over the step, as possible.

Leader technique to make volcadas work

  1. Stay as much on axis as possible: I think that the volcada is most striking when the follower does most of the tilting. Accordingly, when I lead this move, I try to remain almost completely on axis myself. 
  2. Tell the follower not to switch feet by a subtle lift of the embrace (no one else should see it).If you keep your solar plexus energized and lifted, this gives the follower's leg room to swing, even if s/he is not performing good technique.
  3. Think of the follower's support leg/foot like the point of a compass: all the other motion is happening around that main focus or anchor, and returns to that location before moving to another place on the floor.
  4. Once the follower is lifted, move away from her/him to create the tipping motion. Remember to take relatively small steps away, but with your entire axis (don't take your feet and leave your head). I tend to move directly away from the follower with my solar plexus, which means quickly stepping back and to the side with one and then the other foot (I end up with my feet apart).
  5. Catch the pendulum swing of the follower's leg (depending on the step before the volcada, this will be swinging around and towards you, or dropping directly towards you), and draw a shape that ends with the follower's free foot passing by the support foot. If you are doing a regular volcada, it is your responsibility as a lead to ensure that the follower is in the cruzada, and can switch weight to exit.
  6. Note: In my opinion, it is OK to play with Body English (a student of mine calls it Body Castellano) to get the follower's foot where you want it. It is NOT OK to be off balance or out of control as the leader.
  7. Release the "marca" and the lift before asking the follower to take another step. Do not release the lift early, or the follower's free foot gets stuck out in the swing and can't be collected elegantly under her/him.
  8. As soon as you feel the follower's weight change at the cruzada, you can step forward. There is a lot of argument about when to step forward, and I see a lot of leaders stepping forward IN ORDER TO lead the cross step. As a follower, this does not feel as balanced and safe as when the leader places my foot with the chest, and THEN steps. We talked about this in class, and I led both variants on some of you who are taking the class as leaders: you can feel how much more stable it is to wait to step until the follower's feet are anchored; but you can do as you like when I'm not watching ;-)
  9. Exit: Usually, I assume that we'll need one-two steps for the follower to completely regain being on axis. It is especially important during those steps that the leader is on balance and grounded for those steps, IN CASE the follower needs help.
  10. Pet peeve: As a follower, I personally don't like the leaders to move in a circular path WHILE making my leg swing. Usually, this results in me falling into my cross step, and falling out of it to catch up with them. I want to feel protected and supported: wait for me!

Follower technique to make volcadas work

No matter how clearly a leader leads this move, if the follower is not paying attention to technique, it won't work. The follower has the same setup as for a boleo or a gancho or any tango move: correct posture and balance.

  1. Keep your spine energized and stretched: a lot of volcada injuries occur when the follower sags into the move (and yes, I know some teachers say to keep your hips with the leader, but I don't think it's smart in terms of protecting your body). I think of doing a pushup, with my core muscles and abdominal muscles lifted and strong.
  2. Keep your hips aligned over your support leg. For me, I follow Oscar Mandaragan and Georgina Vargas ideas of alignment: my hips need to shift slightly in order for me to be as on balance as possible. This means that my hips are released a bit, on top of my support leg. DON'T hitch up the hip for your "free" leg, or it won't be free.
  3. When the leader tips me forward, I try to be even longer and more elastic than when on axis. I don't let my heel come off the floor on my support leg unless the volcada is so big that I have no choice. I spend perhaps 80% of my energy maintaining the groundedness and stretch of my axis (40% up, 40% down; 20% on the actual volcada).
  4. Release your "free" leg as deeply in the center of your hip joint as possible. The shape of the volcada is determined by the leader's path of your leg (you can make it pretty after you've learned to let the leader be in charge of your leg). If you stay stretched and elastic in your spine and support leg, your "free" leg will naturally have space to slide on the floor. If it gets stuck, go back and look at steps 1 and 2: are you REALLY doing them? (If you are, check to see if the leader has dropped the solar plexus in the middle of the move).
  5. Note: All volcadas are determined by the step that precedes the volcada. If you do the version that we learned that starts with a side step, the volcada will be V-shaped. If you start with a small boleo (this week), the volcada will be more circular. Try to give up guessing where to put your foot, and focus on your support leg and body. Let the leader worry about your free foot.
  6. When the leader places your foot and releases the lift on your body, make sure that you stay in contact with the leader. It's not necessary to immediately return to on-axis; it may take a step of two.
  7. By being stretchy and maintaining your axis even off-axis, you make this move easy for the leader. Even a follower twice my size is light if s/he follows correct technique.

Note: Because this move requires being off-balance and supporting another person's weight, is it VERY important to safeguard the back. Leaders: lift from your legs, not your back. Followers: work your abs to save your back. If something hurts, talk to me: nothing in tango should not hurt! If you feel that another person is injuring your body, make sure a teacher watches to check.

This week: More volcadas, more on vals, and improving your embrace to make moves work better. Still to come: ganchos, posture and balance exercises, and musicality games. See you Wednesday!

Classes start on January 6th! Come dance!

Happy New Year! It's time for class again, time to work off those holiday cookies (for me, at least).

All classes will be held at the Interstate Firehouse Cultural Center, 5340 N Interstate Ave. (Killingsworth MAX station)

$60/six weeks or $12 drop-in

No partner needed, no pre-registration needed; just show up!

Not sure what section you should come to? Drop-in to all of them on Wednesday to make a decision!

Levels and description:

Tango Fundamentals/Beginning Tango

6-7 PM Wednesdays, IFCC

  • Great for diving deeper into the dance, or starting off for your first tango class.
  • This class will focus on correct posture, balance and energy to make tango easy on your body
  • We will learn (or polish) basic tango steps: walks, turns, ochos, the cruzada, etc.
  • Musicality: Make your partner swoon with your amazing use of the music!
  • Navigation: Just in time for Valentango! Learn how to avoid crashes and have fun.
  • FUN: Tango is an improvisational dance. Although there's a lot of technique involved, there is also a lot of room to play, break rules, and mess around!
  • Tango culture and etiquette: how do you ask for a dance? What is a tanda? As a dance anthropologist, I teach not just the dance, but the cultural rules surrounding it.

Intermediate Tango

  • Topics for this session include volcadas, ganchos, and tango vals--and anything YOU need/want/desire.
  • As usual, we focus on deepening body awareness, improving posture, balance, energy and connection with the partner.
  • Musicality: This session, we'll work on vals timing vs. tango timing; really using the music to make the dance rock.
  • Energy: What really makes a dancer intermediate or advanced is their use of energy and the clarity of that intention to the partner. We'll work on building energy levels to make your tango more sexy, powerful, more GRRRROWL in your dance.
  • Improvisation: Tango is not just about set steps. We'll look at connecting steps, finding new patterns, and playing with the dance.
  • Navigation: With Valentango coming up, we'll play some navigational games to make cool moves work in small spaces with less angst.

Milonga Traspie with Robert Hauk and myself

  • Robert Hauk and I are again combining forces to offer a milonga class.
  • New moves! This session, we'll be doing traspie/rebound moves, ocho cortado, saucy stuff I've learned in Bs As, mixed with Robert's horde of repertoire.
  • Navigation: Learn to tailor the size of your steps to the room you have, not cut down your vocabulary just because it's crowded on the dance floor.
  • Come get your milonga on for Valentango!

Elegant walking in tango

My teachers, Oscar Mandagaran and Georgina Vargas, have a sinuous, elegant, sexy walk. They call it "walking like a porteno" but I call it "walking like Oscar" to avoid all the arguments about how portenos do and do not walk. In Buenos Aires, everyone agrees that there are many different ways to do tango, but here in Portland, we seem to spend a lot of time arguing about the one way to do something . . . 

In Tango Fundamentals, we've been working on this walk a lot, but many questions have come up that I think are more easily answered here.

1. How many "tracks" do I use for the "porteno" walk?

Don't you hate the "it depends" answer? In this case, there are two tracks for dancing, but the leader is on one, and the follower on the other. Compared to the "two track" walk, the leader is actually slightly offset compared to the follower, but not enough to be leading to the cross. As each person walks in a straight line, each person steps in front of him- or her-self.

This walk works best in a slight V embrace, close embrace, but not square to the partner.

2. Why is this better than two-track walking?

This walk is simply more elegant than what I see on the dance floor most of the time. Two-track walking is not wrong, but it doesn't look as nice. I'm not going to walk up to you on the dance floor and ask why you aren't doing this ;-) Your walk is a personal choice; mine is to do the walk this way when possible.

There are as many ways to walk in tango as tango dancers. The reason I teach the version of tango that I teach, is that this style uses the body efficiently, and reduces injuries, as well as allowing me to dance for hours with less fatigue and foot pain.

3. But what if the person I'm dancing with tells me I'm not walking right?

What I am teaching you is not what "everyone" is doing in the tango community. You will find people who think that different=wrong. You have two alternatives: improve your dance, or conform to local habits of dance, whether or not they are good dance choices. I like to think that, in a few years, we will all be dancing better and more fluidly, and many more people will be doing this style of walking. I've noticed that all of you who are in my classes look more elegant and balanced. I get a lot more comments about my good dancing since I've switched to this style.

By the way, when I am offered unsolicited advice on the dance floor, I respectfully suggest that I will ask for feedback when I want it.

4. What is all this about contra-body motion?

Part of walking like a porteno is using natural body locomotion. When you walk, your body uses a slight rotation around the spine to help shift the weight of the body from leg to leg. You can see this if you walk and pay attention to how your arms swing gently as you walk. When your right foot is going to step forward, your body rotates slightly to the right BEFORE you step; when you step with your left, your body rotates to the left first. When you step backwards, your body twists away from the free leg.

Using natural contrabody motion also allows you to stay connected to your partner. If the leader is stepping forward with the left, s/he rotates counter-clockwise before stepping. The follower steps back on the right, also rotates counter-clockwise to the left. That means that both people move together, allowing both more freedom of movement AND more connection in your walk.

5. Why do I have to move my hips to make this walk work?

When you walk down the street, your hip releases slightly to help you shift weight from one foot to the other. The hip shift moves your weight directly above your support foot without grabbing with the muscles that surround the hip--more mobility, less work! This is an active, lifting movement, not like doing the "bus stop." This is one key part of having a lithe, sexy tango walk.

To find the right amount of pelvic movement, stand in front of a mirror. Locate the inside edge of your hip joint with your fingers, and move your pelvis until that point is over the center of your foot. Each person will have a different amount of movement here, as a woman with wide hips will move differently than a woman with narrow hips or a man. Instead of copying the look of your favorite dancer, take time to figure out what is right for your body.

6. Why did you tell me to stick out my butt?

Many people stand with their pelvis tilted forward, but the femoral joint (hip joint) works better if the pelvis shifts back further. This settles the femur into the hip joint and helps use your bone alignment for balance so that you use

7. How can I find out more about my body and how it moves?

There is an excellent reference book, designed for the average person, that shows the bones and muscles of the body, as well as explaining what motions the body can perform at each joint. I HIGHLY recommend Anatomy of Movement by Blandine Calais-Germain (ISBN 0-939616-17-3 for paperback). It has great pictures and lots of information without being overwhelming.

Leader back sacada technique and combining sacadas with boleos

Last night, we combined leader back sacadas with follower front cross steps and follower side steps (both line-of-dance, LOD) and looked at ways to exit the moves, depending on navigation needs.

There are three parts to a back sacada, of which only two are visible to the onlooker:

  1. The leader pivots the hips and feet as far around as possible, so that the body is still on axis, but extreme rotation has been achieved, with the torso and hips/feet facing different directions. Both feet need to face away from the location of the sacada, so that the leader's heels and rear end are facing the follower, if possible. Note: if you are not a very flexible person, use the rotation that you do have, and focus on using the next step to adjust the sacada as needed.
  2. Next comes the invisible part of this move. WHILE in full rotation (some people call this disassociation), the leader rotates in space several degrees, with heels gathered together. Don't reach for the back step yet! This is the most important part of a back sacada because it helps avoid kicking the follower's trailing ankle.
  3. As the follower is led to take a step, the leader steps back into the follower's step, landing where the follower originally stood (replacing the follower in space). That completes the sacada.

Note: We did leader back sacadas counter-clockwise (CCW) because they are easier to do in terms of the embrace. I'll address clockwise back sacadas in an advanced class, as the need to "break" the embrace to do these adds another level of difficulty to these steps.

Tips for making the sacadas work better

1. Use a strong embrace on the open side to control the speed and size of the follower's step

The leader gets to choose the speed of the move, so instead of trying to hurry the sacada, I control the follower's step by maintaining the shape of my embrace. If I need more time to prepare for my back step, I slow the follower down compared to the music: better a slo-mo move than bruised ankles!

I don't push on the follower's right hand with my left hand as much as connect with the follower's energy. Some people prefer to keep a limp connection here, but I disagree: by creating a strong connection, I can slow down the follower's movement more easily AND I get to choose the EXACT position of the follower's step. Both partners move at the same time, maintaining the spatial relationship of the steps.

 Leaders: if you pull/push the follower to step, you are losing control over the steps that happen after the sacadas. You will now need to spend several steps regaining control, rather than dancing.When I follow, I often feel leaders pull me through this step by opening their left arm away from their body and their solar plexus. I feel they are saying, "Step somewhere over here, please." Instead of actually leading me, they are indicating that they want me to move and hoping I land correctly. Stay in control and in connection with the follower at all times!

Followers: It's difficult to find the right amount of pressure to use with your right arm. Too much, and the leader can't feel where your feet are. Too little, and the leader can't use the embrace to help the dance. I focus on using my torso muscles to anchor my shoulder girdle. I use very little tension in my upper arm and forearm and wrist. Instead, I think about sending energy out from my body, along the bottom edge of my arm, through the center of my wrist, into my partner.

2. Use the closed side of the embrace to adjust for rotation

The leader's right arm and the follower's left arm need to be able to slide for this move to work. If you've ever seen Francois Truffaut's films, he was fond of the camera iris spiraling closed to end scenes, with the visible scene closing to a pinpoint and disappearing. That is the same thing that happens with the space on the closed side of the embrace. As the leader rotates, the leader's right arms slides around the follower. The follower's arm needs to slide around the leader too, which can be complicated if they are a different height :-)

After the sacada, the embrace returns to normal, with the closed side opening up again. If you are having trouble detaching the follower's hand and arm so that they slide, examine your sacada to see if you are pushing the follower off-balance: both people need to stay on-axis for this to work.

3. Adjust the distance between partners BEFORE the move

Some people teach that the leader should create more space between the dancers before leading a back sacada. I don't agree that this is always the best alternative, especially on the social dance floor. If you find that you simply cannot rotate far enough the complete a back sacada, even with using step #2, you could explore placing the follower further away on the step before the sacada.

4. Use the follower's side step for the leader back sacadas

We worked on leading leader back sacadas through the follower's front step first, in order to feel and understand the need for rotation, but these are a lot easier! The leader has more space because the follower's leg is out of the way.  However, this means that the follower's next step does not continue LOD as elegantly. Next week, I'll show you possibilities for this that we didn't cover this week.

Navigational options after sacadas

As we have been focusing on using sacadas to move around the dance floor, we've tried to do linear sacadas, followed by linear moves LOD. However, there is not always space to continue LOD in real life. One option is to turn the follower in a giro (turn) around the leader after the sacada. Another option is to change direction using a boleo, and then either continue LOD or in place with a turn, having had a few more seconds to gauge space while performing the boleo.

Example 1:

Last week, we had the leader do a leader front sacada through the follower's front cross step, followed by the leader and follower taking mirrored front cross steps LOD. After the sacada, you can lead a small front boleo, and then reverse direction so that the follower is going LOD with a BACK cross step and the leader is stepping forward OR side (depending whether the leader changed feet during the boleo or not). Hint: the follower is already rotating a lot during this combination, so the boleo is more of helping the follower to unwind from a front boleo, rather than adding more force to start the front boleo. Leaders tend to over-lead this, so careful of the follower's body!

Example 2:

On this weeks' combination, with the leader stepping in a back sacada, there are two possibilities:

  1. If the leader does a back sacada through the follower's front cross step, then the front boleo works after this move (see above).
  2. If the leader does a back sacada through the follower's side step, then a back boleo works best, followed by a front cross step for the follower. Again, make sure that the leader is helping the rebound of the boleo, rather than adding a lot of force at the beginning of the move; the follower's hip motion provides the impetus, and the rest is timing, not force.

Basic tango pointers: notes from my Tango Fundamentals class

This session of Tango Fundamentals, we've been working on building balance, connection and energy with our partners.  We've also worked on starting and exiting turns in different ways, as well as spiffing up our traveling back ochos. Here's what we've covered in the first three weeks of class:

Balance, connection and energy

  1. Energy flow drill: This drill teaches you to be aware of the energy and motion of everyone dancing in the room. As a good leader, you must know this in order to successfully and safely lead the follower around the dance floor. As a follower, being aware of this helps you be a responsible dancer (i.e. limiting your boleo height, restraining big adornos in a crowd, etc.). In the energy flow drill, we all move through the available space (in any direction), and try to remain constantly in motion. If someone is in the way, we turn, rather than pausing. If there is space somewhere else in the room, we go where there is space. In "real life" tango situations, there are cultural rules that prevent us from having this much freedom: we dance counter-clockwise in the room; we don't pass the couple in front of us; we maintain "lanes" of movement. However, by remaining aware of the space around us, and how the entire room of people is moving, we can plan ahead better and avoid accidents.
  2. Solo-couple drill: This game teaches you to get connected to your partner quickly. Once the energy flow of the room is working, we move through the space in couples. In Solo-Couple, the teacher calls "Solo!" and everyone does the energy flow drill. When the teacher calls "Couple!" everyone grabs the nearest dancer, and WITHOUT STOPPING, continues to dance around the room. Again, in "real life" tango, there is time to cabeceo, approach the dance floor, take your space, embrace your partner, and then start dancing. However, in festival situations, there is no space to spend time on all of this, and you need to get on the floor, connect, and start dancing within about 30 seconds if you don't want to be run over! This drill gets the dancers to tune in to their surroundings in order to successfully survive joining a tanda in full swing.
  3. Energy bunnies and energy vampires: This game helps you maintain your energy on the dance floor throughout the evening. I don't remember which of my students at the University of Oregon named this game/drill, but I've kept the names because everyone laughs when we do this! Obviously, this is an energy game: take energy from the people around you if you are tired, or give energy to the room/your partner if you are energized. On each dance floor, there is a level of energy present. Sometimes, the room's energy gives the dancers energy; sometimes not. In this game, we move through space in any direction, and make sound effects/motions to send energy to everyone we pass. Then, we move around, taking energy away (little sucking noises and vampire faces seem to be the favorites). I have found that everyone in the room has a higher energy level after this game, and use it in class to wake folks up; on the dance floor, I use this energy-building skill to be able to keep dancing, hour after hour (I don't make the noises and faces then!).
  4. Naughty Toddler: This game helps the follower give energy to the leader, and teaches the leader to use the energy as a way to improvise on the dance floor. Just as it is easier to divert a toddler than to stop unwanted behavior, it is easier to redirect a follower than to wrestle with them. The follower does not follow in this game: s/he does whatever moves come to mind, tango or non-tango. The leader holds on with both hands, and tries to use the follower's energy to get around the dance floor without collisions. As the leader figures out how to steer the "toddler" this game becomes "my chi is bigger than your chi" as the leader reads the energy and PREVENTS the "toddler" from misbehaving by leading clearly with the energy present in the dance: by the end of the game, the leader should feel mostly in control AND the follower should have felt led, but not wrestled.
  5. Posture work: floor, sitting, standing. We start lying on the floor, feet flat on floor and knees up (in skirts, face a non-mirrored wall). Feel how relaxed your spine and hips are! Feel how your spinal alignment works when not fighting gravity. Now, sit up (cross-legged on floor, or in a chair if you lack flexibility). Try to recreate the same alignment as on the ground. Third, stand up and again recreate the floor alignment, adding the complexity of adjusting your pelvis for standing. The more you do these three steps, the more your alignment will remain relaxed AND in position when you move in tango.
  6. Breath work: axis and force field. I do the axis drill after completing the postural work. Standing in place, alone, on axis, close your eyes. Breathe and imagine the air can come up from below the floor, up through your body, to your lungs. When you exhale, send the breath back down through your feet, as if you are pushing a magnet away beneath the floor. After a few breaths, change the exhale to go up through the top of your head and up to the ceiling. Third, exhale and inhale with the same amount of energy and breath coming in from the feet and head; and exhaling 50-50 as well. In the force field drill, face partner close enough to be in their personal space, but not touching. Do the axis drill, but when you exhale, also send energy/light/electricty/your favorite color/etc. straight out your toes, through your partner, and to the wall beyond them. After a few breaths, expand that to a rectangle of energy from the toes and knees; expand to the hips; add up to the belly button; now up to the ribcage; next, include the shoulder blades and collar bones; finally, the entire body sends a rectangular force field through the partner, to the wall beyond. When this is in place, move in to an embrace and dance with your partner, eyes closed. On each exhale, move. On each inhale, pause. Keep the force field working.
  7. Energy work: directing movement from the solar plexus. We moved across the floor, met a partner, and kept sending our energy across the room, slightly up and through the partner (there were interesting interpretations of this, but we'll leave that for later ;-)). In order for you to NEVER step on your partner's feet, you need to send your energy forward into their body. The solar plexus should never point down, or your partner's feet will suddenly be in your way. Followers: remember to send the energy TOWARDS the leader, rather than "escaping" away; it will save your toes!

Steps

Turns: Last session, we concentrated on turning after reaching the cross (la cruzada).  This time, we expanded our ways of getting into a turn.

  • right (clockwise, CW) after side step (follower's first step of the turn is a front or back cross step with the right foot)
  • left (counter-clockwise, CCW) after side step (follower's first step of the turn is a front or back cross step with the left foot)
  • right (CW) after rock step (follower's first step of the turn is a front cross step with the right, across the leader's body)
  • left (CCW) after rock step (follower's first step is a front cross step with the left, across the leader's body)
  • rock step and left (CCW) turn (follower's first step is an open step around the leader with the right foot)--this is NOT the same as starting the turn FROM the rock step. Here, the leader leads a rock step so that the follower's RIGHT foot is free; thus the turn starts with an open step for the follower.
  • at the cross (@X), right (CW) or left (CCW) turn (follower's first step is either a front cross or an open step, with the right foot.

Traveling back ochos: There are many ways to do this step.  I advocate a smooth, elegant, sexy version that allows the follower to pivot slightly and adjust in the hips, while the leader basically walks forward.

  • Get into crossed system: I prefer stepping forward-together-forward, rather than side-together-forward here. I feel that the follower gets a clearer signal if the first step is line-of-dance (LOD), rather than sideways.
  • Leader walks in a SLIGHTLY wider stance, but keeping the V of the feet facing LOD and the hips facing LOD. This is not a time to start waddling ;-)
  • The leader's chest moves in a natural, cross-body motion in order to walk. No more motion is needed here. If you tend to be rigid in your torso, you may have to work on this rotation around your spine in order to make your walk more elegant and easier on your body.
  • The follower's body also uses cross-body motion in order to walk backwards. Because you are now in crossed system, the follower's free leg NATURALLY crosses behind the other leg. The hips adjust and pivots slightly, as do the feet, to make this look pretty and to remove stress on the spine. Take care not to overturn in this move (in open embrace, a bit more rotation can be used for a more zig-zag style of ocho, but I personally prefer this one.
  • To exit, walk to the cross in crossed system, resolving at the cross. Alternatively, you can exit by turning CW or CCW into a turn. I don't usually lead back into parallel walks to exit because it isn't very elegant. Also, when do you ever have space to walk traveling back ochos and then keep walking? :-)

This week, we'll be adding walking to the outside track, in parallel and crossed systems, and playing with the "forgotten" side of tango.  See you in class!

Parallel grapevines as framework for linear sacadas, line-of-dance

In class last week, we worked on parallel-system grapevines and used them as a framework for inserting linear front sacadas into the dance. The main idea is to continue traveling around the room, but switching places with the follower as you go.

This is a simplified version of an exercise/tango framework that I learned from Chicho in his advanced workshops in Buenos Aires. It uses the idea of a traveling grapevine as a way to constantly move line-of direction, rather than getting stuck in one location on the dance floor. It can be done in close or open embrace; using a lot of room, or in small spaces; it is a flexible framework, which is why I like it. We'll get to Chicho's cross-system version when we are ready for it!

There are two kinds of parallel-system grapevines: mirror and parallel (I know it's confusing, but I didn't name them).  In mirror, when the leader leads the follower to take a front cross step, the leader accompanies that with a front cross step; and both take open steps and back cross steps simultaneously; the leader is the mirror for the follower. In the parallel, parallel-system grapevine, the leader takes open/side steps at the same time as the follower. However, when the follower takes a front cross step, the leader steps back cross, and when the follower crosses behind, the leader crosses in front.

The grapevine goes around the room, line-of-dance. The leader facesthe follower and BOTH travel line-of-dance. There are two possible configurations: the leader faces out of the room, or the leader faces into the room; and the follower faces the leader in both cases. I think of the movement as a two-lane, or track, path around the room.

The purpose of the sacada is to trade lanes with your partner. The most obvious place to trade positions is when the follower is taking a front cross step, line-of-dance. On that step, the leader leads the follower to take a front cross step onto the leader's track, while doing a sacada (with his/her front cross step) to land on the follower's original track. Then, both continue down the line-of-dance, but on the new track. For example, if the leader started facing OUT of the space, after the sacada, the leader will face IN and the follower will face out.

After the front sacada, the follower gets a half front ocho to pivot around to take another front cross step. The leader can receive the step with a front cross (no pivot needed). To me, the leader's sacada feels like a side step through the follower's step, followed by a front cross step.

If this sounds confusing, it's a lot more obvious when trying it with another person because the embrace requires each person to move correctly in order not to let go of each other :-)

We'll go over this in class and add other sacadas to it before tackling the cross-system version. There are also ample opportunities for boleos, turns, etc., to be built of of this system.

Who’s Leading? Gender Role Transformation in the Buenos Aires Community

Many of my students have asked for access to my M.A. thesis on tango that I completed at the University of Oregon in 2002.  I had rewritten the first two chapters for use in my Dance and Folk Culture class at the University of Oregon when I taught in the dance department.  I have decided to put it up as a page (beware, it's long!) that you can find under my list of pages: go to the right column of my blog and you'll see it there.  If you are interested in the entire thesis (the rest of the work focuses on my fieldwork and the interviews I collected from tangueros in Buenos Aires), it is available for $15 from me, plus shipping if you live outside the Portland, OR area.

Compact combinations with front boleos

Last night in intermediate tango class, we worked on two close embrace (or open if you like) combinations that included front boleos. I enjoy teaching moves that I lead, but that I don't see out there on the dance floor very often.

This was a continuation of some ideas we worked on the week before, with the added request from a leader to learn compact moves that would keep him interested, but help him avoid crashing into others.

Front boleo at the cross

What I like about this boleo is that you can lead it on a crowded dance floor, with almost no preparation, on any intermediate or advanced dancer who can follow a boleo. It can be a quick move, or almost slow motion, allowing the follower to play with the exit step, adding an adorno, or just caressing her way through the leg motion. Mmmm! This is a move for the follower, not to show off to your buddies watching: it's small and delicious.

  • For this move, you need to have your cross (cruzada) dialed in. If you arrive at the cross with no energy, or off balance, this is NOT the time to lead a boleo.
  • As the follower arrives at the cruzada, and switches weight onto the left foot, the right leg is free and available for a boleo.
  • The leader rotates slightly to the left to free the follower's right leg, and then keeps rotating to the left to create a "con" boleo (both people rotating the same direction, or counter-clockwise here). It is very important for the leader to keep the hips facing forward, or this step becomes a left turn, not a rotation in place for the follower.
  • As the leaders noticed in class, the key element is timing, not force. This is a rebound, not a throw and catch sequence ;-) You need to create rebound in your torso by keeping the hips forward, and then give the follower's leg time to finish the rebound AFTER you until both of you are ready to exit the move.
  • The follower needs to release the free leg (right) at the hip joint while standing tall on the support leg (left). Make sure that you pivot your foot on the floor enough to allow your hips to turn through the space around your axis; don't start the boleo too soon, or you will kick the leader. Keep your heels together in your "V" until the leg has to release, creating the boleo.
  • After the release of the boleo, the follower's body unwinds, or rebounds, back to neutral to allow a walking exit from the boleo.

Front boleo after the walkaround turn

Most intermediate dancers already know how to do traveling back ochos. Most also have good skills at leading turns. This move combines those elements with a spiffy front boleo that is used as a change in direction in the middle of the sequence.

Leader's information:

  • Here, having smooth traveling back ochos sets up for a tight turn, which leads to the boleo.
  • Make sure your traveling back ochos go DOWN the room, not from side to side, leaders. In class, we polished this move to make it more enjoyable for the follower.
  • After either .5 or 1.5 ochos, the leader is on the left foot traveling line-of-dance (LOD). Twist the torso (but not the hips) to the right (clockwise) to get the follower turning around you with a "back cross, open step, front cross" turn.
  • As soon as they vacate the space where they were standing before the turn, step there and rotate in place for the follower's turn. This is a sacada in a way, as you are replacing (or displacing) the follower in space. However, you step around the follower's foot, not through the open space between her feet, so it looks different.
  • As the follower lands on the front cross step (the follower's right foot), rotate as if to make a front ocho BUT don't allow the follower to step forward: keep them on balance on the right foot. Overrotate until the follower's left leg does the boleo, and rebound back.
  • At this point, the ending we learned is my favorite way to use this step on the dance floor. If done correctly, you end up facing LOD, ready to walk down the floor. As the follower unwinds from the front boleo, have them do a left turn (back cross, open step, front cross) around the leader until the leader faces LOD, and walk.

Follower's information:

  • On your traveling back ochos, make sure that you use your hips to do most of the rotation, rather than swinging your legs for momentum. This will make it easier to overturn into the right turn.
  • When the leader and you are both on left feet, the leader will have you overturn to his/her right. This gives an overturned back step to begin a three step turn: back cross with right, open step with left, forward cross step with right.
  • As you arrive on the right foot, you should feel an impetus to pivot, as you would for a front ocho, but without being sent forward into a step. The pivot should be extreme, so that your left leg has to release around your support leg (right) for a front boleo.
  • Let the boleo rebound into a back cross step with the left, open with the right, forward cross step with the left, to end up facing reverse LOD, ready to walk down the floor.
  • Remember that your boleo is a response to the leader's torso rebound. Just like a whip handle and whip tip, your leg trails the leader's initial twist, so you will finish a fraction of a moment behind the leader's move. They should wait for that unwind, and use your momentum to start your turn to the leader's left.
  • Hip motion: we worked a bit on the proper hip placement in a pivot, so that the leg swings more freely. The knees contact each other (like Pringle potato chips), fitting one in front of the other, and releasing back for the rebound. Remember that the boleo energy comes from the hip pivot and leg release, not from winding up and swinging.
  • After the front boleo, make sure that your free foot passes against the heel of your support leg, to avoid kicking the leader :-)

Those of you were in class, try these moves out, and let me know if I forgot to include something that you need to help remember the combos. I've been doing these for so many years that sometimes I forget to explain something when I write it down!

New classes start October 28th

Due to some family issues, I will not be teaching in Vancouver for the next six-week session, but I AM offering my Portland classes. I will be teaching beginning and intermediate tango levels, plus milonga traspie on Wednesday nights (see class descriptions below).

Location:

Interstate Firehouse Cultural Center
5340 N Interstate Avenue
Portland, OR

Cost:
$60/person for six-week session; $12/class drop-in
No preregistration necessary
No partner necessary

Wednesdays @ 6 PM: Beginning Argentine Tango/Tango Basics for all levels

This class covers walking in parallel system, walking to the cross, basic front and back ochos, basic turns; musicality; navigation; the embrace; energy, correct body alignment and basic exercises to build technique. It is perfect for a first-time dancer, an intermediate dancer who is polishing their tango fundamentals, or an intermediate or advanced dancer who is learning the other role (lead or follow).

I teach from a body-based approach. I feel it is important to find and use the body's balance, alignment and breath. I apply my anatomy and kinesiology training from my M.A. in Dance to help you find a body-efficient path to tango. Read my teaching bio for more of a taste of my approach.

I think that too many people forget that dancing (and therefore, tango) is supposed to be fun! We'll work on building an improvisational, playful, energized dance, right from the start.

Wednesdays @ 7 PM: Milonga Traspie (co-taught by Robert Hauk)

This session, Robert and I will focus on basic milonga traspie (a fast dance related to tango that has both elegance and groove). We will learn how to syncopate in milonga, building both dance vocabulary and musicality. This class is aimed at intermediate and advanced dancers.

Each week, we will focus on a set of related steps and movement information. By the end of the session, you will have a bunch of cool new moves and combinations to let you rock the dance floor!

Wednesdays @ 8 PM: Intermediate/Advanced Intermediate Tango

This class is for students who have reached intermediate level (or higher) in their dance, and are looking to learn new material. Each week, we'll work on new exercises, games and material that build your tango. Each six-week session will cover different material than the session before; the plan is to create a year-long course of tango study, whether you drop in from time to time, or make a commitment to weekly tango exploration.

I teach from a strong body-based model. Correct alignment, use of muscles and breath, are super-important. Also, learning to electrify tango through energy work, making your dance elegant and sensuous. Find your own style, experiment, play. Fun is a main component of tango for me. We'll play movement games to help build improvisational skills, new combinations and a new approach to the dance.

We'll be done in time for you to hop on your bikes, on the MAX, and into your cars to get down to the Wednesday night alternative milonga at Norse Hall.

Private lessons

Private lesson times are available  during the day (weekdays), and on Monday, Tuesday and Thursday evenings. These are at my house. Please email or call to schedule. The cost is $50/hr or five for $200.

Sharing lessons: The cost for private lessons is the same for 1-4 people. I have an intermediate couple who would like to share lessons with another couple. They learn quickly, are detail-oriented, and are a lot of fun. Currently, they are scheduled for 7 PM on Tuesdays, but there may be some flexibility. Please contact me if you are interested, and I will put you in touch with each other to see if you are a good fit for sharing lessons.

Being a tango "parent" or "grandma": what my students are doing with tango, Part I

On Monday night, after Tangofest, I ran into Robin Thomas for the first time in a year. He introduced me to the person sitting next to him, and we tried to figure out when we'd first met (answer: "ages ago"), and laughed about being dancers who have students who are now teaching other dancers: we are tango grandparents!

I'd like to introduce you to some of my tango "children" and what they are doing in the tango world now. I am very proud of them, although I certainly can not take all the credit: these are talented folks who have worked hard to become teachers, DJs, performers, artists, etc. If you are one of my tango "children" or "grandchildren" please let me know what you are up to, so that I can post about you.

We'll start with my "oldest child" in tango: Vicky Ayers is teaching tango in Eugene, OR, as well as globe-trotting off to do fabulous things in the world of dance and education in South America. She was one of my first students in 1996, and has been teaching for years. She and her husband, Tom, specialize in canyengue style tango. Recently back in Eugene, she has organized a women's practica on Mondays that seems to be really taking off. She is one of my favorite partners for dancing: she will follow ANYTHING I throw at her, and she purrs if she really likes the move/musicality. Vicky, if you're reading this, tell me more, tell me more!

Other former students who are teaching: Rebecca Rorick Smith (Portland), Jake Stevens (Portland), Dominic Bridge (last seen headed for Florence), Rick Roman (Eugene), Nancy Reid (Newport), Frank Davis (Salem), Ev Marcel (Eugene), Liz Foster (Eugene), Jacob Tolbert (Eugene), Marisela Rizik (Eugene), Allene Friedman (Portland), Carrie Whipple (Portland)--although I taught her ballroom, not tango :-), Ying-che Chen (Taipei), . . . I know I've forgotten someone. David Huh and Kathryn McDonald should be teaching in Seattle, but I think they are off on other adventures. If any of you would send me information about what you are doing, your website, etc., I'd like to connect us all together.

And then there are the organizers and DJs. Michelle Dreher Thoma in San Francisco is one of the San Francisco Tango Exchange organizers. She and her husband, Ben Thoma, are movers and shakers down there in SF. Emily Pierce DJs in the San Francisco Bay area as well. 

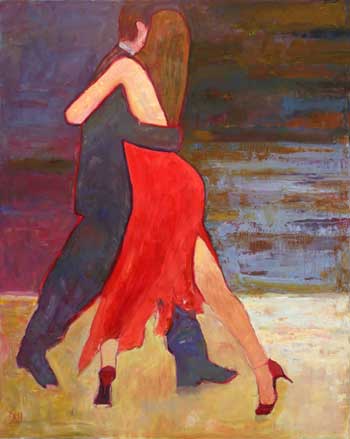
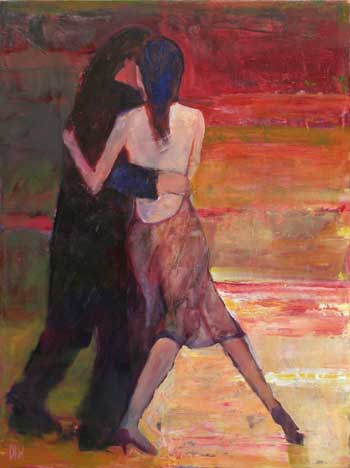
Another group of my students are professionals in other fields, but use tango as their muse. For example, Dennis Hartley (Eugene) has started painting tango dancers. He gave me permission to post some of his paintings, so here are my favorite two so far (below). You can see all of them at http://tangoartprints.com/

Blogpainting1 

Blogpainting2

I know there are a lot more of my "children" and "grandchildren" out there, doing tango, salsa, ballroom, etc. Send me an update at ewartluf@gmail.com or as a comment here. Thanks!

Fall classes with Elizabeth Wartluft

All new classes start the week of September 15th.

Beginner/Advanced Beginner Argentine Tango

Thursdays, 7:15 PM
Riverside Performing Arts, 1108 Main St., Vancouver, WA
$72/6 weeks, $60 students, seniors and continuing students

This class will cover: walking, basic salidas, the cruzada, basic turns and front ochos; musicality, navigation, connection, energy, and the embrace. For advanced beginners, I will provide more complex variations and more focus on musicality and connection. As always, my focus is balance, alignment, efficiency of movement, to create an elegant, sensual and playful tango.

Intermediate Argentine Tango

Wednesdays, 8 PM
Dancing Soul, 4315 NE Garfield Ave., Portland, OR (or nearby: I'm in negotiation for a larger space)
$72/6 weeks, $60 students, seniors and continuing students

I design this class to be taken a minimum of three times before advancing to the next level, so I cover different topics each six weeks. We learn the technique from the ground up for paradas, sacadas, ganchos, adornos, quebradas, calesitas, planeos, etc. Continuing from my beginning classes, we will learn harder variations of turns and ochos, combining them with the new repertoire. As always, my focus is balance, alignment, efficiency of movement, to create an elegant, sensual and playful tango.

If you are unsure as to whether you belong in intermediate or advanced, please contact me for an evaluation.

Advanced Argentine Tango

Tuesdays, 7 PM
Dancing Soul, 4315 NE Garfield Ave., Portland, OR (or nearby: I'm in negotiation for a larger space)
$72/6 weeks, $60 students, seniors and continuing students

For those of you who knew my classes in Eugene, this is my Tango 3 class. Pre-requisite: you should already know the technique for the steps listed above in Intermediate class, and be ready to pull out the BIG guns: overturned ganchos, colgadas, volcadas, boleo combinations, shared axis turns, crossed system grapevines, leg wraps, etc. (one of my Eugene students called it "crazy sh**"). The focus will be integration: using these steps on the social dance floor safely and elegantly. Every week, you'll leave class with new material for your dance.

If you sign up with a partner, you may stay with that partner for the class, but you will learn more quickly if you switch around. If you come to the class without a partner, I expect that you will be flexible about dancing with any other member of the class, in order to best learn the material.

Milonga with Robert Hauk and Elizabeth

Wednesdays, 7 PM
Dancing Sould, 4315 NE Garfield Ave., Portland, OR (or nearby: I'm in negotiation for a larger space)
$72/6 weeks

Robert and I will be teaching a milonga class together. We're really excited about it! At this time, the class is full, but we will be able to open it up if we get a larger space, so let me know if you want to be added to the waitlist.

Beginning Salsa

Thursdays, 8:15 PM
Riverside Performing Arts, 1108 Main St., Vancouver, WA
$72/6 weeks, $60/students and seniors

I've been teaching salsa since 1993, but haven't had a chance to teach it in the Portland area yet.  By the end of the six weeks, you'll have enough material to go out and tackle the dance floor! Lead/follow technique, basic moves and improvisational extras will all be covered. Tango folk: come learn a dance that has that same improvisational possibility, but with hips and saucy music!

Private lessons: $50/hr or $200/5 hours

I strongly suggest combining private and group lessons for optimal dance learning. A group setting allows you to practice your technique and meet other dancers socially. A private lesson focuses on technique on a deeper level than a group class allows. Even one private lesson every few months will help your technique. For the serious student, a weekly private lesson plus group classes and/or time on the dance floor, is the most efficient way to learn tango well. If private lessons are not in your budget, consider finding someone to share lessons to split the cost, or contact me re: barter.

"Visualizing Movement Potential" for tango

I'd like to summarize and expand upon another of Irene Dowd's fabulous articles in Taking Root to Fly. Rereading them all these years after my Movement Fundamentals class (thanks Sherrie Barr, my teacher!), I realize how much these ideas have become the basis of my teaching. Irene Dowd credits HER teacher, Dr. Lulu Sweigard with much of the content of this article, so read her work, too!

Her main idea in this article: the nervous system runs all the systems of the human body. Therefore, if we want to change how we move, we need to change the way our nerves and brain interact with the rest of the body: our neurological pathways. We can change these pathways through conscious attention, by changing our movement habits. 

"Dis-ease" or lack of ease, comes from the body being out of balance. The more the muscles are balanced around a joint, the less stress is put on the body to use and maintain that joint. The more the systems of the body are in balance, the easier it is to move in an efficient and pain-free way. Balance does not mean that the body is at rest, but rather that all muscles and systems have moments of rest and moments of movement, so that no part of the body is being constantly used (or constantly relaxed) and thus becoming fatigued, injured, or too weak to use correctly.

Dr. Sweigard taught correct use of the body through VISUALIZING lines of movement through the body in order to repattern how the body used energy.  She used the "constructive rest position" (lying on the floor, with the feet flat on the floor, knees up, hips/back relaxed, and arms out and up, relaxed against the floor. After the person visualized the movement in this position, she gradually transitioned them to visualizing the movement while standing and then moving around:

"Visualizing a line of movement thorugh the body while not moving can change the habitual patterns of messages being sent from the brain through nerve pathways to the muscles. As long as this constructive new thinking pattern is activated during movement, a new pattern of muscle activity is automatically being used to decrease physical stress and maintain a more balanced alignment of skeletal parts. Over a period of time during which there is continual daily attention to new habit patterns in thinking and action, the body's shape will be transformed." (p. 2)

This is what we are doing in my classes: realigning hips, knees, ankles, feet and body for more efficient balance front-back and left-right. Then, for each movement, we are repatterning how the body moves through a step to make it efficient. Each combination of muscles and joints works in balance with the body. Efficiency removes pain and imbalance. If you are in pain, the first step is to alleviate pain through teaching the body and neural pathways a new way of moving.

If something isn't working, don't just continue to repeat that step: "Not even a worm will persist after repeated negative reinforcement. The solution is to go one step back to something you can do, crawling perhaps." That may mean that you have to learn to stand and walk before learning tango. Master the fundamentals before going on so that you experience success. When you can do a movement, or series of movements, correctly, then the neural pathways have learned that and are ready to do more complex repatterning.

Exercise, part I (on the floor in constructive rest position)

  • Lie on the floor in constructive rest position.
  • Relax your body, either through visualization (sand or water or ? flowing out of your eyes, ears, hands, toes, wherever you have tension, until the body feels relaxed, open and receptive) or by tensing and then releasing each set of muscles until your body feels relaxed throughout.
  • Take time to really bring your body to neutral: this relaxation may take quite some time if you are under stress or have chronic pain in your body. If you do not feel receptive and relaxed, you will not be able to visualize new patterns easily.
  • First, visualize the basic, fundamental parts of the new movement. For example, if you want to make arm or leg movements that require your center and spine to support them, visualize a long, stable spine, and then do small or easy movements with the limb you want to use.
  • Relax again, while you continue to visualize the flow of strength and stability in your spine, lengthening without working your muscles.
  • Now visualize the entire movement you want to do, without moving your body. Imagine the sweep of the energy through your body, through each joint that is needed, through the muscles that will be used. Imagine doing it without pain or difficulty. While you are doing this, your new neural pathways are being created.
  • Any time you feel the old pattern (or pain or tightness), go back to the relax/go to neutral phase and start over. If you keep trying while it hurts or while you are clenching your body, the new pathways are NOT being formed.
  • Only spend 5-10 minutes doing this at a time: staying in one position for a long time is not good for the body: it contracts some muscles constantly, and lets others relax constantly: what we are trying to avoid ;-)

Exercise, part II (warming up, standing)

  • Get up off the floor slowly.
  • Start doing small movements to warm up the body: leg joints, arm joints, spine, neck, etc.
  • When you feel warmed up, move around doing movements you already know, letting your body feel the "rightness" of these motions.
  • Only at this point should you try the movement.

Exercise, part III (doing the new motion)

  • Do the new movement, focusing on the small, basic parts of the movement first.
  • When you do it correctly, no matter how small a part of the movement is right, congratulate yourself! Give yourself positive encouragement. This is an improvement, even if it is small and gradual.
  • Repeat the successful movement until it feels more "natural" than "strange" (your body needs to start to feel the rightness of it to memorize it as "the right way").
  • Repeat each day: this helps you learn the right movement through it feeling right, and also helps your body develop the new neural pathways more quickly.

Exercise, part IV (let it go)

  • Your body works on neural pathways, and on integrating new information, on its own. Let it do the work!
  • Go off and do other things; let go of the new information consciously, and come back to it tomorrow.
  • Come back to it daily: if you wait too long, you undo the work you did before, and must start over.

Although a teacher can help you learn what motion is correct, and can check in with you to help you adjust the process if it is not working, most of this work is YOU. Focus on the positive: the mind and body are plastic. The human body and mind can learn to do all sorts of movements. YOUR human body can do this. If you can imagine your body doing a motion, you will eventually be able to perform that motion with your body. Irene Dowd says:

"It takes about two months of daily practice from the time you have started to think about your movement differently to the time that your muscles visibly change shape. While sixty days into the future seems like a long time to wait before a new internal balance brings tangible results, it isn't very long at all in comparison to your whole life which you have already spent developing the form you now have." (p. 6)

Off you go now! I need to do my visualizations of the perfect adorno.

Postural information for dancing Argentine Tango

This is some of the work we've been doing in my Tango Fundamentals class this summer. We are six weeks into this class, with four more to go. I usuallywait and post the review as a page, but I'm going to post this much on my blog so that you all read it before coming to class this week ;-)  I'm working on the steps we've done, and will post that ASAP, with updates until the end of classes.

Postural information

Hips

The hips needs to be positioned correctly both from front to back, and side to side. From front to back, the hips have to be aligned in such a way as to take stress off the lower back, while tilting slightly back. This alignment really comes from using the psoas and other core abdominal muscles (I think this will take another blog entry, so hang onto that thought for the moment) to lift and stretch the entire back, so that each vertebra can rotate slightly, with ease.

The way that Georgina got my back into the right position (the first time) was to lift me from my rib cage, until my lower back relaxed, but I had a very lifted, stretched feeling in my abs. Once you find this position, it doesn't vary, but remains uniform throughout the dance.

The side-to-side motion of the hips changes with each step, in the shape of a pendulum. The pendulum motion aids in changing weight and staying on balance. The point of the hip motion is to position the hip joint above the foot arch to maintain balance more easily. It is NOT a hula motion and it is NOT Cuban motion. It helps the dancer to use ALL joints for movement, from the neck to the foot, rather than the knees.

The same motion (both forward/back and side/side) is used by men and women, but it looks different because the pelvic bones are shaped differently. Similarly, a woman with wide hips and a woman with narrow hips will do the same motion, but it will look VERY different. The point is that there is not a correct LOOK, but a correct ALIGNMENT: don't try to make it visually match another dancer whose body is not similar to yours.


Knees

Keep both of them slightly flexed. This aids in balancing the body. Try not to put extra stress on your knees and quadriceps. Keep your knees as together as possible, but focus on keeping the ENERGY in between the knees, whether you can touch them together or not. If you are feeling a lot of work going on in your quads, adjust your hips further back. I've noticed at the milongas that a lot of people dance while crouching a little bit. Tango is not tennis ;-) and we need elegance as well as balance. Remember to stretch up the entire length of your body WHILE keeping the joints released.


Feet

Your feet stay in a V, with the heels together all the time. The "free" foot keeps contact with the floor for energy and balance. In heels, the ankles touch each other, big toe down on the floor. Guys, think about your big toe maintaining connection with the floor in the same way (it will look different because of the heel height). I think of this as a "kick-stand" that provides extra balance. 

Oscar and Georgina say 1% of the weight is on the "free" foot.  I'd agree with that. The weight on the foot is balanced, 1/2 on the ball, 1/2 on the heel. The weight is also balanced down the center line of the foot, although the ankle energy focus is towards the other foot. If you tend to roll in, think about connecting with the outside edge of your foot. If you tend to roll out, like me, focus your attention in, towards the big toe.

Forward steps are ALWAYS heel toe (do you walk down the street toe heel?). Side steps: the heel usually hits right before the ball of the foot, but it depends on the step. Backwards, the foot hits toe heel. If you relax your ankle right before you step, the correct, "normal" anatomically efficient movement will usually happen in all directions.

Solar plexus

Keep your solar plexus lifted all the time. It does NOT tip up and down; it remains the same during the dance. When I lead, I aim my solar plexus a tiny bit above straight ahead. If I tilt my solar plexus down, the follower's feet suddenly get in my way, because I have directed their energy down, rather than out.

The energy of the dancer connects the partners at the solar plexus, even when dancing in styles where the solar plexus is not always touching. I prefer a small V embrace, where the dancers are not facing each other squarely. I still keep my energy towards my leader. When I dance open embrace, I follow all of these postural rules; the dance doesn't change when it opens up unless we get sloppy and sacrifice posture and connection for (poorly-executed) fancy steps.

Contrabody position

Contrabody position, where the solar plexus and hips rotate slightly away from each other, is not a big movement. It is small but occurs in every movement, just as it occurs in your normal walk (if it doesn't occur in your normal walk, we need to work on your non-tango locomotion for improved efficiency off the dance floor ;-) We worked more on this in the intermediate class (for those of you taking both levels), so I'll focus more on this in another entry.

Reminder: next session of classes will begin in early September, both in Portland and Vancouver, WA. If you'd like to sign up for a few private lessons between sessions, now is the time to do that. If you have never studied with me before, I am offering a "first class special" of $10 off my regular rate for one private lesson; as always, if you buy four at a time, you get a fifth one free!

Milonga and vals class, Salem, Summer 2009

I disagree with teachers who think that new tango learners should avoid milonga and vals until their tango is in good form. Frankly, I think these two dances are more accessible than tango. The music is catchy and more cheerful, which attracts dancers from other genres (lindy, West Coast swing, contradancers, folk dancers, ballroom folk). Also, because the emphasis is on really moving to the music, beginners can let go of aiming for perfection in technique and enjoy DANCING. Too often (IMHO), tango learners and teachers forget that this is supposed to be FUN!

OK, off my soapbox, at least for a few seconds. In milonga and in vals, what I look for in a partner is: connection, ability to move me to the music, joy in dancing and (icing on the cake) good technique. Given that, we worked on learning a few moves, oldies but goodies, and spent the bulk of our time honing our musicality.

Milonga musicality

In milonga, you can focus on moving on the stressed beat of the music, without pauses or syncopation for the most part. This produces an elegant, more flowing dance (smooth milonga, or milonga lisa). This is a good starting point for the beginning milonga dance, as well as a form that can be taken to amazingly graceful heights with practice.

The "Everyready Battery Bunny" exercise is based on this style: followers step on each beat, in place, heels touching, unless moved through space by the leader. Of course, in "real life," you wouldn't be this automatic about it; but it helps to be ready to move on each beat so that the dance goes smoothly. Make sure that you are not automatically walking backwards: the leader gets to pick the direction and the step. You just help make it musical and peppy!

The other style of milonga is milonga traspie which focuses on syncopation to play with the music in a more boisterous way. I think that the dance should still be elegant, but with underlying groove so that it rocks (please, no bouncing arms). Oscar and Georgina did a milonga at Wednesday night (Norse Hall) that had most of us rooted to our chairs: it was sexy, elegant and raucous as the same time! (and then they sat down and said, "Interesting! We've never danced milonga to [cumbia] before!" Wow: brand new music AND amazing musicality.

But I digress. The traspie steps that we began belong to this style of milonga.  Traspie literally means "behind the foot", but can also mean "stumble" or "trip." This step has that tripping rhythm: BAHdum BUM, but only if you use a rebound (revolte): instead of three even counts, I think rebound, STEP. It's not about the initial step: this move stresses the step after the rebound.

Everything we did EXCEPT the vai-ven step (see step review at the bottom of this post) can be turned into a syncopated move. Other people may not agree with me, but I think this step only looks good when the timing remains slow (6 slow steps).

Milonga clips

Here are a few YouTube clips to inspire you. Oscar and Omar learned from the old milongueros. Dani IS an old milonguero. The young couple have nice style, and are repeatedly using the turning grapevine we learned: look how you can put the traspie steps in between!Elegant and sassy milonga: Oscar and Georgina

Omar Vega doing candombe milonga: outrageous and crazy!

Dani: milonguero doing a great milonga

Here's the turning grapevine step

Here's the half-grapevine/sawtooth thingie (and adornos): Graciela Gonzalez

Vals musicality

There are several ways to use the music in vals. Vals is in 3/4 timing (three beats per measure, with the first beat stressed). There is nothing wrong with sticking to moving on the first beat of each measure, but if you want to play with the music, practice each of these separately, walking and later dancing moves. Then, put them together. The BLOB exercise we did focused on playing around with all the rhythms, while moving through space. I find singing along (Dah DEE Dah dum DAH DAH DAH dum . . .) helps, but then again, I was trained as a singer before getting into dancing.

Normal possibilities

1 2 3 1 2 3 1 2 3 . . . (accent on the first beat of each measure; this is used the most)

1 2 3 1 2 3 1 2 3 . . . (accent on the first and last beat of each measure; this is also used a lot)

1 2 3 1 2 3 1 2 3 . . . (accent on the first and second beat of each measure; equally cool, but used less)

1 2 3 1 2 3 1 2 3 . . . (all three beats of the measure used; avoid using this as a default, oh my ballroom dancing tangueros!)

1 2 3 1 2 3 1 2 3 . . . (pauses of . . . whatever length; not used as much in vals as in tango, but useful)

Places to mess around with this:

  • walks (corridas, or little runs of QQS)
  • turns (remember, some steps of the turn are traditionally quicker): on the back and next side step, try different variations.
  • walking to the cross: "maybe yes cross" can be done in many different timings; play around! New folks this session: we didn't do this step, so don't worry about this)
  • turning grapevine: perfect place to play
  • traspie: usually done in syncopated timing anyway, but play with 1 3 1 and 12 1 timing.

Abnormal possibilities

Musically inclined leaders who have advanced tango skills and advanced music skills, tend to go off the beaten path with vals. I find myself led into moves such as "1 . . . 2 3 . . 3 1" simply because the leader thinks it's fun to make me dance on the off beats. Leaders: this MESSES with follower's brains; only do this when you know the follower will enjoy the geekiness of the variations (most will NOT enjoy it because it detracts from the flow of the dance). As a tango geek, I can appreciate strangeness IF IT IS LED WELL.

Folks who lead this well: Evan (now of NYC); Alex (Pland); Charles (Eugene) and Noah (Eugene). I'm sure there are more, but these guys understand the music on a deep level. Even after fourteen years of leading tango, I personally don't like to lead these strange variations, except with one or two stellar followers who purr, giggle and verbally express appreciation of the silliness.

Vals clips on Youtube

After a week with Oscar and Georgina, so few folks look good out there on YouTube (yes, I know I am biased, but after all, that's why I organize for them! They are amazing). I couldn't find a vals with them dancing, but here's another couple who taught me a lot about vals musicality in their classes in Buenos Aires:

Tete y Silvia: remember the "walk and turn" exercise we did? I learned that in Tete y Silvia's classes in Buenos Aires. As long as you are clear about what direction you are heading, it's easy for the follower to keep up.

Vals at Glorias Argentinas: Although these folks don't have fabulous technique, they DO have fabulous musicality and connection. Watch how he only uses a few patterns to make a nice dance.

Nestor Ray and Silvina Vals: very much like Tete, Nestor Ray has a very turny, smooth dance.  Watch how he does lots of walking and turning--and not much else; look how nice it is!

Milonga and Vals steps from class

Given the fact that two of our leaders had never danced tango/milonga/vals before these six weeks (bravo, guys!), I stuck to basic moves that you can use in all three dances equally well. Those of you who are more advanced can look at your review sheets from the past year, and add back in other moves we've learned. Also, it never hurts to work on musicality: how many ways can you do each of these?

  1. walking forward LOD (that is, leader walking facing line-of-dance)
  2. walking backward LOD (leader)
  3. taking side-together steps: out towards the side of the dance floor, or LOD (leader's left shoulder facing LOD and leader's right shoulder facing LOD)
  4. vai-ven step (go-come): Leader's step is forward on the left, in place with the right, in place with the left; back step with the right, in place with the left, in place with the right. I like using this to bracket the turning grapevine, to find my space on the dance floor, or to finish a sequence where the music is calming down after something more vibrant. Follower's step: back on the right, in place with the left, in place with the right; forward on the left, in place with the right, in place with the left.
  5. turning grapevine (clockwise, traveling LOD):1. Leader steps forward on left, 2. forward and through with the right (like going to the cross), and then 3. steps laterally line of dance (lead faces out, follower faces in); leader 4. steps back on right, 5. back on left (leading follower forward and through to the inside), and 6. open with the right (lead facing in, follower facing out). Follower does the same steps as the leader, but in this order: 456 123. In other words, follower steps back on right, back on left, laterally (facing in) with right, LOD; then forward on left, forward and through with right, and laterally (facing out) with left, LOD; finish with a walk or whatever.
  6. Ocho cortado ("cut ocho"): Leader steps forward on left (either after salida or from walking . . . no "correct" way); then rocks back onto right foot; then steps backwards on left foot, leading the follower through to the leader's right side.  Leader then puts both feet down OR steps SLIGHTLY open with right, to lead the follower in the last three steps; finishing with feet together, ready to walk out with left foot.  Follower steps back on right, rebounds forward onto left foot, steps forward and through with right foot, then pivots slightly into a lateral step (like a side step of a turn). This step rebounds back to the follower's right foot, and then the leader pivots the follower again to close the left foot in front, as in going to the cross.  If you Google ocho cortado on YouTube, you will see what we talked about in class: EVERYONE has different ideas of how this step SHOULD be done. I've taught you what feels most comfortable for the follower, but feel free to mess around with variations ;-) ocho cortado
  7. Giros ("turns"): Remember the "rocks-in-the-stream" game? We walked, listening to the music, and then did half or full turns and then walked again. Remember that, just like water in a stream, the movement rarely stays in one spot for a long time. A lot of turns continue to travel down the dance floor while turning. Let this exercise provide some improvisation in your dance. Instead of worrying about where to start and end the turn, just walk and turn, walk and turn, as the music tells you. The follower's job is to stay with you. HOWEVER: if you are not clear about what direction your torso is pointing/moving (downstream, please), the follower will not know, either. Clarity, clarity, clarity! For those of you who prefer structure: you can turn from a side step, so that the follower's first step is a front or back cross around you. We also looked at starting turns as the leader stepped back in the vai ven.
  8. Sawtooth/half-grapevine: I'm sure there is a name for this step, but I learned it dancing with old guys in the milonga, not in a class; no one said, "Hey, let's do the x step!" To start, leader does a salida, moving LOD with the left foot, facing "out" of the space. Then, leader steps forward and through with the right (like going to the cross); and steps TOGETHER with the left; steps straight back (towards the center of the floor) with the right; and together OR open with the left. If you step together, you get a very crisp, sawtoothed pattern. If you step open, you get a "castle wall" kind of effect.  Neither is wrong, but stepping together looks more elegant and takes less room. The follower needs to be careful not to automatically do a grapevine pattern without being led. Follower steps side with the right, LOD, to start, then back diagonal with the left, still moving LOD and outwards from the dance space. After that, the follower steps in place with the right foot, and straight forward with the left foot, to begin again or exit.
  9. Traspie ("stumble, trip"): We did two versions of this: 1. sd, rebound, step forward (for leader); and 2. fd, rebound, step forward (for leader), which seems to be harder for a lot of folks. Remember that the rebound has to happen BEFORE taking the forward step. You MUST return to an on-axis, body-over-supporting-foot balanced position before continuing through for the next step. If you have Oscar and Georgina's rhythmic tango DVD, there are wonderful instructions for doing this well (as well as ocho cortado variations). I can't find it on YouTube; ah, well.

I've really enjoyed this class. I find it impressive that we have dancers who have six weeks of tango experience (really, none, since we did milonga and vals), up to four years' experience, in one class. With one exception, we covered information requested by the class: new moves; musicality; walking; milonga; and better posture, technique, etc.. Sorry that we didn't get to your boleos, Karen.

For those of you who live close enough to get to Portland, Robert Hauk and I will be collaborating on a milonga class up there this fall. Stay tuned for details!

Boy, is it hot here!

Hi folks!  I've almost got the Salem review page done (up Wed.?) and the up-to-date reviews from Portland summer classes. My brain slows down when it gets this hot. I don't think I'm going dancing tonight: just TOO hot. I'm planning group classes for Wednesday night that don't require a lot of touching: definitely open embrace!!

Salem class: review and more on traspie tomorrow night (is it air conditioned?).

Portland beginners: more on turns and different kinds of ochos, but in open embrace; it's too hot to touch!

Portland intermediates: We'll work more on organic dance building: maybe the boleos we've done, paired with turns and something new?

"A little bit better" each time

Last night, I danced a tanda with Oscar Mandagaran, and every time somethingdidn't work, I thought, "Aha, that's going to be in my lesson tomorrow, isn't it?" The nice part is that I no longer get nervous dancing with him; it's another thing to have thirty people watching your feet because you are dancing with the star: that part makes me freak out in a way that someone who has performed dance for twenty plus years should not. "Relax, Ely!" he kept saying every time we passed the corner that was packed with people staring, "You're rigid like a board!". THIS is why I used to dance with my eyes closed, Oscar!

I just finished a private lesson with Oscar and Georgina. I worked with them in June when they were here, and got "homework": work on stepping laterally, pivoting, and stepping forward/backward. That looks like an easy thing to do, but when you are changing how you've been pivoting for fourteen years of tango, it feels frustrating to have to practice to change; why can't I just DO it?

I think about June: Georgina told me to focus on the future of my tango, not look back at past mistakes. Deep breath; starting over is good, starting over is good, starting over is good . . .

I practiced almost every day this past month (OK, usually I am not such a good student, but I knew they'd be back in five weeks, so I had to work). "A little bit better" was the comment. I appreciate the honesty: I know they would tell me if it weren't better, and when they say, "YES! Perfect!" I know they mean that. The new information is working most of the time. "Now, let's work on the subtlety of the move," says Oscar. Ay! A whole new level of what wasn't working well.

However, I know that things are going well when we move on and work on new things. Traspie, a concept I thought I had 100% in my body, turns out to be something I need to improve in my dance. I couldn't feel the subtle differences between big and small moves. In my defense, everyone I dance with tends to use only one style: big OR small. On the other hand, I should be able to do this better ;-)

Oscar dances with me, saying, "See, Georgie? That's what I was talking about last night." Georgina places herself where I can see her and she can see me in the mirror, and guides me through about twenty minutes of doing all sorts of sizes of traspies, with and without pivots, in every direction possible. Then, Oscar dances with me to see if it feels right for the leader. More traspies with pivots. Aha! I am finally getting how to pivot more easily during the traspie; I was doing it too late in the movement. More exercises with Georgina, more dancing with Oscar.

An hour later, I feel that I understand exactly what I need to be doing in traspie, in pivots, and for little adornos around my feet ("Ack! Ely! Don't go so close to your toes! You'll hurt yourself!"). My body doesn't feel exhausted from stretching my torso as long as possible.  My hips don't feel too fatigued from the traspie work, although I now know which muscles SHOULD feel tired if I do this right, a hundred times. I could have done another hour, but there are three more students right after me, so I have to wait for another day.

I feel fabulous, even if this is going to take another fourteen years to be amazing.

Approaching tango from different angles

In my current tango teaching, I've been trying a new approach: alternating very technical, anatomy-based, high-focus work with my crazy, zen games about the flow of energy, organicity of movement, and the FUN of tango.

I have apparently been forgetting the fun aspect too much recently.  A student commented to me that my technique class made tango seem very hard.  Relax the ankle! Don't bend the knees too much! Angle your hip joint for the best balance! Breathe! Stretch the spine! Push off the floor! etc. Yes, all of this is important for beautiful technique, but no wonder some folks give up on tango!

For this coming week, I am going to play tango games. And I do mean play: tango has so much improvisatory scope that the only way to fully explore it is to turn off the analytical part of the brain for a while, and move from the body; let the brain follow along as best as it can.

For my intermediate class, we are going to look at how the flow and energy of a dance movement suggests the next step. Rather than plan an A + B + C approach to the dance, we are going to use momentum and suspension and going on/off balance, to find what move comes next: a turn? a boleo? a pause? What makes sense from the flow of the motion?

What does the music suggest? Slow, fast, pause, what? If you weren't doing tango, what would you do to this music? If you are doing tango to it, what do you see in your head (turning off the "but I don't know how to do that move" part of the brain)? What other move is like that, and may work instead? When the song is over, you should have learned something about that piece of music, as well as having dancing during it. It's not just about the beat . . .

What does the space demand? Oh no, I'm in a tight corner: what could I do? Wow, extra space in front of me: what works here? Geez, that person ALWAYS backs up in front of me: how do I protect my partner? Forget steps: what direction could I go?

What does my partner provide that adds a layer to this dance? Do I have a follower who is giving me tons of extra energy to tap into, or do I have to provide the gas for this dance? Is my leader responsive to my messing around with the dance, or do I need to just give lots of energy, but not a lot of adornos? How can I be the best partner for this person, for this dance?

For my beginners, we'll play naughty toddler again (for some students, this is new next week): the follower does whatever s/he wants to do, and the leader attempts to keep the dance moving more or less line-of-dance, without crashing into furniture or other dancers. We'll find how much energy can be funneled into the dance to make it fun, if out of control. For the leaders, we'll see how easy it is to lead a partner with a lot of energy, and how to use that energy better. For the followers, we'll find out how much energy can be used to make an active follower, and where the out-of-control line lies with each leader.

I'm still working on what else we'll do, but I think we all need a break from being so serious ;-)

Plus, Oscar and Georgina will be here!!!!! I'm kind of nervous about teaching with my teachers watching, and I'm sure they've never seen such a weird tango class, but perhaps it will spark an interesting discussion! Either way, you'll see me taking class with them all weekend, working on technique again. They always inspire me to work harder to make my dance more energized and full of joy, so BRING IT ON!

Tango New Year: now I'm REALLY on my axis

Oscar Mandagaran and Georgina Vargas delivered a kick-ass weekend of workshops for Eugene, OR. Every time I study with them, I am again both inspired to work hard, and amazed at how far I still have to reach for perfection. Wow! A new year of tango has started for me, and with it, New Year's resolutions.

The power of positive thinking

When I told them that I couldn't believe how bad my dancing was before, Georgina said, "Ya se fue, no exista ahora" (that's gone already, it doesn't exist now). "Don't think of the past and mistakes: focus on how good it is now, and how good it's going to be in the near future!" Oscar added. That will be my goal for this year, letting go of old stuff and moving on to great, new, fabulous things in life and tango.

The power of new shoes

One new part of my tango is: my Comme Il Faut, bumble-bee black and yellow, stiletto heeled tango shoes. I had put off buying new shoes for a while (say, oh, seven or eight years?!). Each time I thought about buying shoes, I'd say to myself, OK, the next time I go to Bs As, I'll get more shoes. Well, a few years of working a job with no vacation, then a child, then the move to Portland . . . and suddenly, all my shoes look shabby. Unable to buy NeoTangos in Portland, I caved in and bought Comme Il Faut shoes.

I love these shoes. My feet look sexy, flashy, NEW. They only go with some of my outfits, but who cares? I am now on a shoe-buying frenzy, with two more pair on the way from NeoTango.

I am not someone who spends money easily, so why all the new shoes? Because, after going to the milonga one evening, Oscar and Georgina looked at each other, nodded, and said, "OK, Ely, you must throw out all your old shoes. Your technique is so much better in your new shoes that you look like a different person. Your old shoes are worn down, and are pulling you off your axis.  They MUST go in the trash. Do NOT wear them."

As usual, Oscar and Georgina are correct. Suddenly, I have to be on my axis. With stiletto heels, there is no margin of error: either I'm on axis, or falling over. With these tiny little heels, all the information about relaxing my hips, stretching my solar plexus up, pushing off the floor, really ARRIVING on each step--all this instantly makes more sense. For the first time in my life, the initial wear on my heels slopes in a bit, allowing my ankles to collect, rather than rolling out into my old flat-footed stance. All my old shoes reflect ten years of my dancing. I've gotten better, but they are still fighting me to return to my old ways. Out they go into the trash.

The power of repetition

I am doing my tango exercises daily. Oscar and Georgina gave me exercises to work on. They come back in a month to teach in Portland (yay!), so I have a short-term goal of being able to improve my walks forward and back, lateral steps, pivots (lateral, pivot, forward; lateral, pivot, back) and shoulder blade placement. It's nice to be in a space in tango where I am happy to just make my walk perfect; I know I'll work on the other stuff later. I no longer have to do the "hard" stuff or prove my level. What is important is that I feel all the details in my body in order to help my students understand these elements.

Each time Oscar and Georgina come back (this will be visit #4 in two years), I can feel how my understanding of the dance has deepened. The repetition feels good, and each new level is built upon a strong base, always improving, always becoming more elegant, always becoming more enjoyable for me, with ANY partner. So I will repeat my exercises and get used to my new, improved shoes and my new, improved balance.

The power of community

This year, I am going to collect about me people who are good, positive, lovely folks, and share tango with them. The energy I see and feel in tango seems to be lacking in big chunks of the tango community. I look around, and many people seem to have forgotten that tango is FUN. I see frowns, blank stares, slouchy postures, walled-off energy. Let's get rid of all of that!

I am starting to teach group classes in Eugene again sometime this year. We've got an exciting plan to boost the tango energy and the level of dancing there. I am teaching group classes in Portland, and I'm going to start a milonga or practica this year, somewhere fun (I'm looking at a cool cafe right now): somewhere to come have a cup of coffee, dance, talk to people, build community. I've got some plans for another town or two nearby: a little chain of tango satellites to Portland, connecting communities, creating dancing spaces and people to make even more tango happen in this area.

Community to me means house parties and potlucks. It means coffee outings and going salsa dancing with tangueros. It means going tango dancing with swing dancers. It means telling my neighbors and the people at the playground about tango, and encouraging new dancers to try a turn around the floor. The tango community needs to reach out to not-yet-dancers (I don't believe there are actually non-dancers in the world, just folks who haven't had the opportunity to learn yet). Imagine: the whole city dancing!

The power of beginning another cycle

New classes:

Portland:

Beginners: 7 PM Wednesdays, starting this week! $80/10 weeks, @ 4315 NE Garfield Ave.
Intermediates: 8 PM Wednesdays, starting this week! $80/10 wks, @ 4315 NE Garfield Ave.

Salem:

Beginners: 6:30 PM Tuesdays, starting this week! $65/6 wks, @ The IKE Box, Cottage & Chemeketa
Intermediates: 7:30 PM Tuesdays, starting this week! $65/6 wks., @ the IKE Box, Cottage & Chemeketa

Private lessons: Every third Tuesday, Eugene; every Tuesday evening, Salem; M, W, Th, F, Portland.

Coming soon: classes in Eugene (Mondays) and Vancouver (probably Fridays).
Coming soon: advanced class in Portland, (probably Thursdays)

New attitude, new shoes, new technique, new classes, new focus. Now I'm REALLY on my axis!

A new tanguera experiences Oscar & Georgina--and you can, too!

Oscar Mandagaran and Georgina Vargas are not just for the advanced tango dancer.

After only a few months of tango, one of my students and friends in Portland, Sarah, told me she was headed for Buenos Aires. "You MUST study with Oscar and Georgina!" I told her, and connected her with them. Here's some email she sent me this spring from Bs As:

Email #1: I'm studying with Oscar and Georgina!!!!!!!!!!!! (I think her original version had more exclamation points than that, but I can't find the email to cut and paste)

Email #2: After that first email, I asked her to comment on studying with Oscar & Georgina:

"I´m in BA right now studying with Oscar and Georgina three times a week. Oscar and Georgina are exceptional, and if I could I would insist that anyone learning Tango must learn from them. They exude the essence of tango in their own bodies and dance (it really takes your breath away to see them), but are the most delightful and enthusiastic teachers that I have met.  I am a beginner, but they not only have patience and give me excellent instruction, but they genuinely seem to care about me. In teaching they combine the ability to give highly skillful and timely instruction, demand a high level of participation ("no holidays!", as Oscar loves to say while smiling at the beginning of class), while somehow making you feel like what you are doing is important and good. And to anyone who is intimidated by how completely mouthwatering and delightful and passionate their own dance is to look at, you might take comfort in knowing that I was at a Milonga last night with them where they dance among all the other Milongueras to refuel and be at home. I highly recommend grabbing the opportunity to study with them in Eugene or Portland, with the only reservation being that I will have to share them with you!"

Email #3: Sarah emailed me to say that she had more to say:

 
"Georgina and Oscar developed a way to dance tango that creates a pain free, organic, and natural feeling dance. Since I didn´t realize that about their teaching method before I came to Buenos Aires, this was not why I chose to study with them.  So, it came as a surprise to me to notice over the last three weeks that the pain in my feet and my low back have slowly disappeared.  Because I´ve back pain for years I had no expectations of relief from it.  But I find that I feel more freedom in my body, and well as I said...very suprisingly.. no pain at all when I dance."